Baby Brezza Bottle Washer Pro Manual: A Comprehensive Guide
This manual provides detailed instructions for setting up, using, cleaning, and troubleshooting the Baby Brezza Bottle Washer Pro (BRZ0103), ensuring optimal performance and longevity.
Welcome to the world of effortless bottle cleaning! The Baby Brezza Bottle Washer Pro is designed to revolutionize your routine, offering a steam-powered solution for thoroughly sanitized baby bottles, nipples, and accessories. This innovative appliance drastically reduces the time and effort spent on manual washing, freeing up valuable moments for you and your little one.
This guide will walk you through every step, from initial setup and operation to maintenance and troubleshooting. Users on platforms like Reddit have shared experiences, highlighting both the convenience and potential issues like power failures. Understanding proper descaling and filter maintenance, as detailed in comprehensive guides, is crucial for optimal performance and preventing error codes.
Unboxing and Initial Setup
Carefully unpack your Baby Brezza Bottle Washer Pro, ensuring all components are present. These include the main unit, clean water tank, waste water tank, bottle rack, and accessories. Before first use, thoroughly rinse the clean and waste water tanks with warm water. Place the machine on a stable, level surface near a power outlet.
Fill the clean water tank with distilled or filtered water to the indicated fill line – crucial for preventing scale buildup. Ensure the waste water tank is correctly positioned. A comprehensive setup guide, like those found online, will detail these steps for a smooth start, avoiding potential issues reported by users.
Components of the Bottle Washer Pro
The Baby Brezza Bottle Washer Pro consists of several key parts. The Clean Water Tank holds the purified water used during washing cycles, vital for spotless results. The Waste Water Tank collects the dirty water, requiring regular emptying. The included Bottle Rack & Accessories securely hold bottles, nipples, and other items during cleaning.
A crucial, often overlooked component is the floating magnet, essential for proper operation. Maintaining these parts, as detailed in guides, prevents errors. Users have reported issues when these aren’t correctly assembled or cleaned, highlighting their importance.
Clean Water Tank
The Clean Water Tank is a vital component, holding the purified water used throughout each wash cycle. It’s crucial to fill this tank with clean, filtered water for optimal bottle sanitation. Maintaining the water level slightly above the fill line, as recommended in troubleshooting guides, ensures proper function.
Regularly check for mineral buildup, as this can impact performance. Descaling, a key maintenance step, keeps the tank operating efficiently. Proper water quality directly influences the cleanliness of your baby’s bottles.

Waste Water Tank

The Waste Water Tank collects the dirty water expelled during the washing and rinsing processes. It’s essential to empty this tank before each new cycle to prevent overflows and maintain hygienic operation. Troubleshooting often involves verifying the Waste Water Tank is completely empty if error codes appear.
Regularly cleaning the tank itself is also important, preventing residue buildup. A full Waste Water Tank can hinder the machine’s performance and potentially cause malfunctions, so consistent maintenance is key.
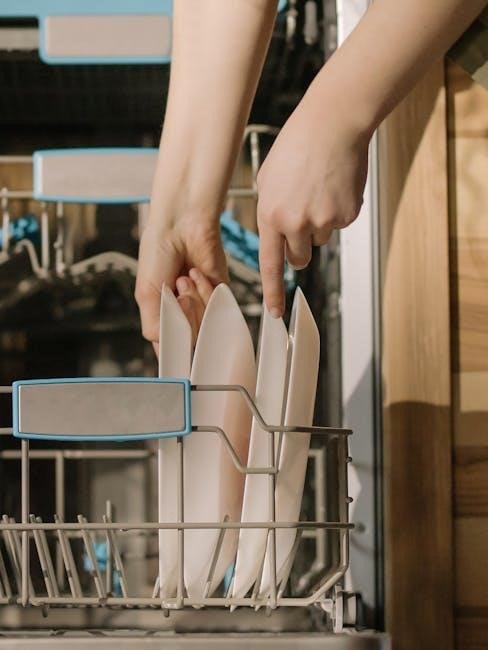
Bottle Rack & Accessories
The Bottle Washer Pro includes a specialized bottle rack designed to securely hold various bottle sizes and types during the cleaning cycle. This rack also accommodates nipples, rings, and other small accessories. Proper loading of the rack is crucial for ensuring all items are thoroughly cleaned.
Ensure bottles are positioned correctly to allow water jets to reach all surfaces. Avoid overcrowding, as this can impede cleaning effectiveness. Regularly inspect the rack for any damage or wear, replacing it if necessary to maintain optimal performance.
Operating Instructions: Step-by-Step Guide
Before first use, ensure the machine is properly set up with clean water in the designated tank and the waste water tank is empty. Carefully load the bottle rack with bottles, nipples, and accessories, avoiding overcrowding. Add the recommended amount of detergent – approximately 3g (0.1oz) of powder dishwashing detergent is suggested, based on similar models.
Select your desired cleaning cycle (Normal, Sanitize, or Quick Wash) and press the start button. Monitor the cycle and address any error codes promptly, ensuring the floating magnet moves freely.
Loading the Bottle Washer
Proper loading is crucial for effective cleaning. Arrange bottles, nipples, and accessories on the bottle rack, ensuring water can reach all surfaces. Avoid overcrowding; leave space between items for optimal water circulation. Place larger items, like bottles, on the lower rack and smaller components, such as nipples and rings, on the upper rack.
Confirm that no items obstruct the spray arms or the movement of the floating magnet. Securely position the loaded rack inside the machine before initiating a cleaning cycle, and always double-check for proper placement.
Adding Detergent (Recommended Amount)
Use only powder dishwashing detergent specifically designed for automatic dishwashers; liquid detergents are not recommended. Based on comparisons to similar bottle washers with a 4-bottle capacity, a recommended amount is approximately 3 grams (0.1oz) of powder detergent.
Avoid overfilling, as excessive detergent can leave residue. Add the detergent to the designated compartment before starting the cycle. Always check the detergent packaging for specific instructions and adjust the amount based on water hardness and soil level.
Cleaning Cycles Explained

The Baby Brezza Bottle Washer Pro offers multiple cleaning cycles to accommodate various needs. The Normal Cycle provides a thorough clean for everyday use. For enhanced hygiene, the Sanitize Cycle utilizes higher temperatures to eliminate more bacteria.
When time is limited, the Quick Wash Cycle offers a faster, yet effective, cleaning option. Cycle selection is easily managed through the machine’s control panel, allowing users to customize their bottle washing routine based on their specific requirements and bottle contents.
Normal Cycle
The Normal Cycle is designed for daily bottle cleaning, effectively removing milk residue and formula buildup. This cycle utilizes a combination of water jets and detergent to thoroughly sanitize bottles, nipples, and other accessories. It’s ideal for standard cleaning needs and provides a balanced approach to hygiene.

Typically, the Normal Cycle duration is approximately 60-70 minutes, ensuring sufficient time for a comprehensive wash. Users should refer to the machine’s display for precise cycle timing and completion status. This cycle is a reliable choice for maintaining clean baby feeding items.
Sanitize Cycle
The Sanitize Cycle offers a heightened level of cleaning, employing higher water temperatures to eliminate bacteria and germs. This cycle is particularly useful for newly purchased bottles, or when a deeper clean is desired, providing peace of mind regarding hygiene. It’s recommended for thorough disinfection.
Expect the Sanitize Cycle to run for a longer duration, typically around 90-100 minutes, due to the increased water heating and cleaning process. Always ensure proper detergent usage for optimal sanitization. This cycle is crucial for maintaining a sterile environment for your baby’s feeding essentials.
Quick Wash Cycle
The Quick Wash Cycle is designed for lightly soiled bottles and accessories, offering a fast and efficient cleaning solution when a full cycle isn’t necessary. This cycle prioritizes speed, completing the wash in approximately 30-40 minutes, making it ideal for daily use and smaller cleaning tasks.
While convenient, remember the Quick Wash Cycle may not be sufficient for heavily soiled items. Use a recommended amount of detergent to ensure effective cleaning. It’s a great option for bottles used with water only, or those rinsed immediately after use, saving both time and energy.
Maintenance and Cleaning
Regular maintenance is crucial for optimal performance and longevity of your Baby Brezza Bottle Washer Pro. Consistent cleaning prevents buildup and ensures hygienic operation. Descaling the machine is essential, as mineral deposits can hinder functionality and affect cleaning effectiveness. The exterior should be wiped down regularly with a damp cloth to remove spills and residue.
Pay close attention to the floating magnet; ensure it moves freely during operation. A clean machine translates to cleaner bottles and a prolonged lifespan for your valuable appliance, maintaining its efficiency.
Descaling the Machine
Descaling removes mineral buildup that can impede the Baby Brezza Bottle Washer Pro’s performance. To troubleshoot errors, ensure the machine is descaled and thoroughly cleaned, allowing the floating magnet unrestricted movement. This process involves running a descaling cycle with a descaling solution (follow solution instructions).
Empty both the clean and waste water tanks before and after descaling. Restart the machine after completing the cycle to verify proper operation. Regular descaling, as recommended, maintains optimal cleaning efficiency and prevents potential issues.

Cleaning the Exterior
Maintaining a clean exterior is crucial for hygiene and longevity. Regularly wipe down the Baby Brezza Bottle Washer Pro’s exterior surfaces with a damp, soft cloth. Avoid abrasive cleaners or harsh chemicals, as these can damage the finish. Pay attention to areas prone to spills or residue buildup, such as around the control panel and tank openings.
Ensure the machine is unplugged before cleaning. A mild dish soap solution can be used for stubborn stains, followed by a clean water rinse and thorough drying. Consistent exterior cleaning contributes to a sanitary and presentable appliance.
Troubleshooting Common Issues
Encountering issues? This section addresses frequent problems with the Baby Brezza Bottle Washer Pro. If the machine won’t turn on, verify the power cord connection and outlet functionality. Error codes indicate specific malfunctions; consult the manual for solutions. A common issue involves the floating magnet – ensure it moves freely by descaling and cleaning the machine thoroughly.
Also, confirm the wastewater tank is empty and the clean water tank is appropriately filled. Addressing these simple fixes often resolves operational difficulties, restoring the bottle washer to optimal performance.
Machine Won’t Turn On
If your Baby Brezza Bottle Washer Pro fails to power on, begin with the basics. First, meticulously check the power cord’s connection to both the machine and the wall outlet. Ensure the outlet is functioning correctly by testing it with another device. A tripped circuit breaker could also be the culprit – reset if necessary.
If these steps don’t resolve the issue, there might be an internal problem requiring further investigation or contacting Baby Brezza customer support for assistance. Do not attempt to disassemble the unit yourself.
Error Codes and Solutions
Encountering an error code on your Baby Brezza Bottle Washer Pro indicates a specific issue requiring attention. A common solution for many errors involves ensuring the machine is thoroughly descaled and cleaned. This allows the floating magnet to move freely, a crucial component for proper operation.
Additionally, verify the waste water tank is completely empty and the clean water tank is filled to slightly above the fill line before restarting the machine. Refer to the full manual for a comprehensive list of error codes and their corresponding solutions.
Floating Magnet Issues & Resolution

The floating magnet within the Baby Brezza Bottle Washer Pro is essential for detecting water levels and ensuring correct cycle operation. If the machine malfunctions, a restricted or immobile magnet is often the culprit. Regularly descaling the unit is paramount, as mineral buildup can impede its movement.
Ensure the machine is clean and the waste water tank is empty. A freely moving magnet is vital; if issues persist after cleaning, consult the full manual or contact Baby Brezza support for further assistance and potential repair options.
Filter Replacement
Maintaining the Baby Brezza Bottle Washer Pro’s HEPA filter is crucial for ensuring consistently purified water during each cleaning cycle. The HEPA filter effectively removes impurities, contributing to a more hygienic bottle washing process for your little one. Regular replacement, as outlined in the comprehensive guide, is recommended to uphold optimal performance.
Locate the filter compartment and follow the step-by-step instructions for safe removal and installation of a new HEPA filter. Consistent filter changes guarantee the highest level of cleanliness and sanitation.
HEPA Filter Location
The HEPA filter within the Baby Brezza Bottle Washer Pro is strategically positioned to maximize water purification before and during the cleaning cycles. It’s typically housed within a dedicated compartment, easily accessible for routine maintenance. Consult the detailed diagrams in this manual to pinpoint the exact location of the filter within your specific model (BRZ0103).

Understanding its placement is key to swiftly and correctly replacing the filter, ensuring continued optimal performance and the highest standards of hygiene for your baby’s bottles.
Replacing the HEPA Filter
To replace the HEPA filter, first, ensure the Baby Brezza Bottle Washer Pro is completely powered off and unplugged. Locate the filter compartment (refer to the ‘HEPA Filter Location’ section). Gently open the compartment and remove the old filter. Insert the new HEPA filter, aligning it correctly with the designated slots and ensuring a secure fit.
Close the compartment firmly. Regularly replacing the filter – typically every 6 months, or as indicated – maintains optimal water purity and sanitation for your baby’s bottles, guaranteeing a thorough clean.
Safety Precautions
Always unplug the Baby Brezza Bottle Washer Pro before cleaning or performing maintenance. Keep the appliance out of reach of children to prevent accidental operation or access to cleaning solutions. Never immerse the base unit in water or any other liquid. Use only the recommended detergent amount; excessive detergent can leave residue.
Ensure the waste water tank is emptied regularly to prevent overflow. Do not operate the machine if the power cord or plug is damaged. If issues arise, discontinue use and consult the troubleshooting guide or contact customer support.
Warranty Information
Baby Brezza offers a one-year limited warranty against defects in materials and workmanship from the date of original purchase. This warranty covers functional parts and does not include damage resulting from misuse, accidents, or unauthorized repairs. Proof of purchase is required for all warranty claims.
To initiate a warranty claim, contact Baby Brezza customer support with details of the issue and your purchase information. The company will, at its discretion, repair or replace the defective product. This warranty provides exclusive remedies and limitations apply; see the full warranty details online.